

Purchase Order
A purchase order (PO) is a commercial document issued
by the buyer to the seller, which indicates the types, quantities and agreed
prices for products or services the seller will provide for the buyer.
Once the PO is sent to the supplier, then there is a
legal offer to buy products or services. Acceptance of the PO by the seller is a
one-off contract between the buyer and the seller, so no contract exists until
the contract is accepted.
Usually, a PO is issued for goods or services over
3500 in value.
The Purchase
Order Quick View screen allows
you to set the status as “on order”
and “received”, both of which
affects stock control.
You can also use the Update GL button to post the accounting
double entries for this transaction. This entry will be posted as a Purchase
Entry under the Supplier
module.
Purchase Order Quick View screen
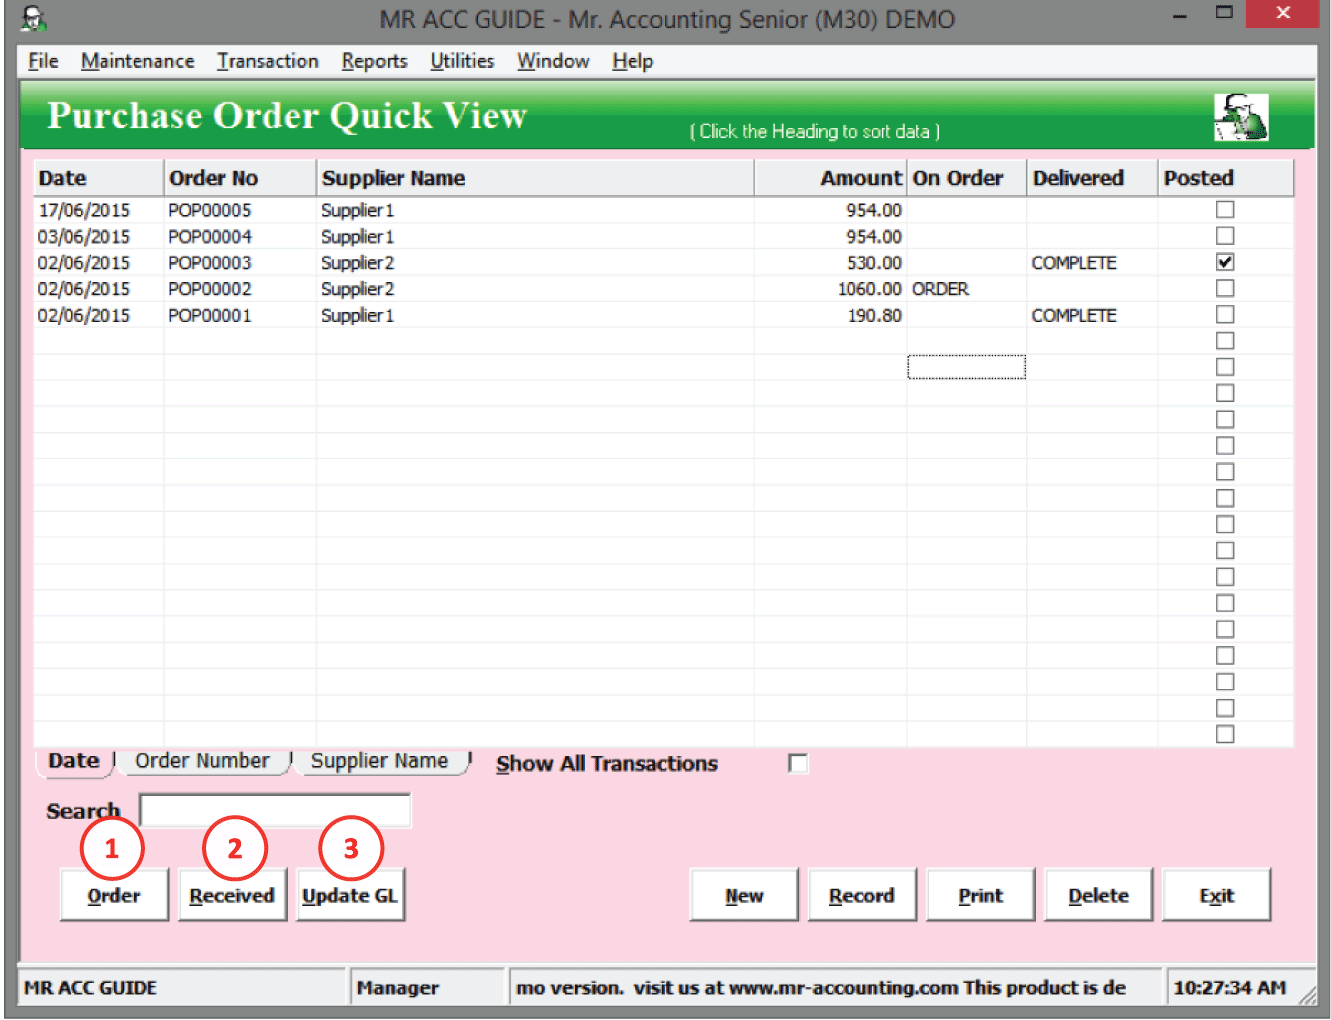
(See below for 1, 2 & 3)
1.
Order: This will mark the stock
as being “On Order” in the Product
Master, but the stock won’t be
placed under “In Stock”. The “ORDER” word appears under the On Order
column.
2.
Received: If you select this, then
stock in that PO will be received and entered into “In Stock”. This is selected
when the delivery order is received from the supplier and the stock has been
delivered. The “COMPLETE” word appears under the Delivered
column.
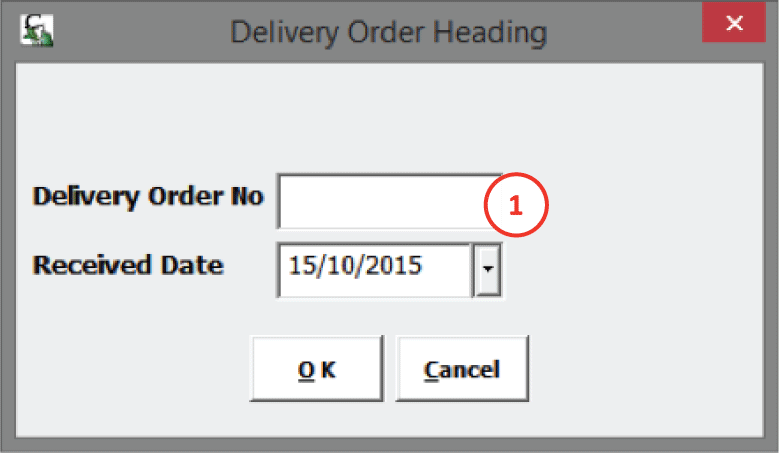
1.
This new window pops
out after you select Received.
Select the Delivery Order No from
the DO that you received, and the date you received the
goods.
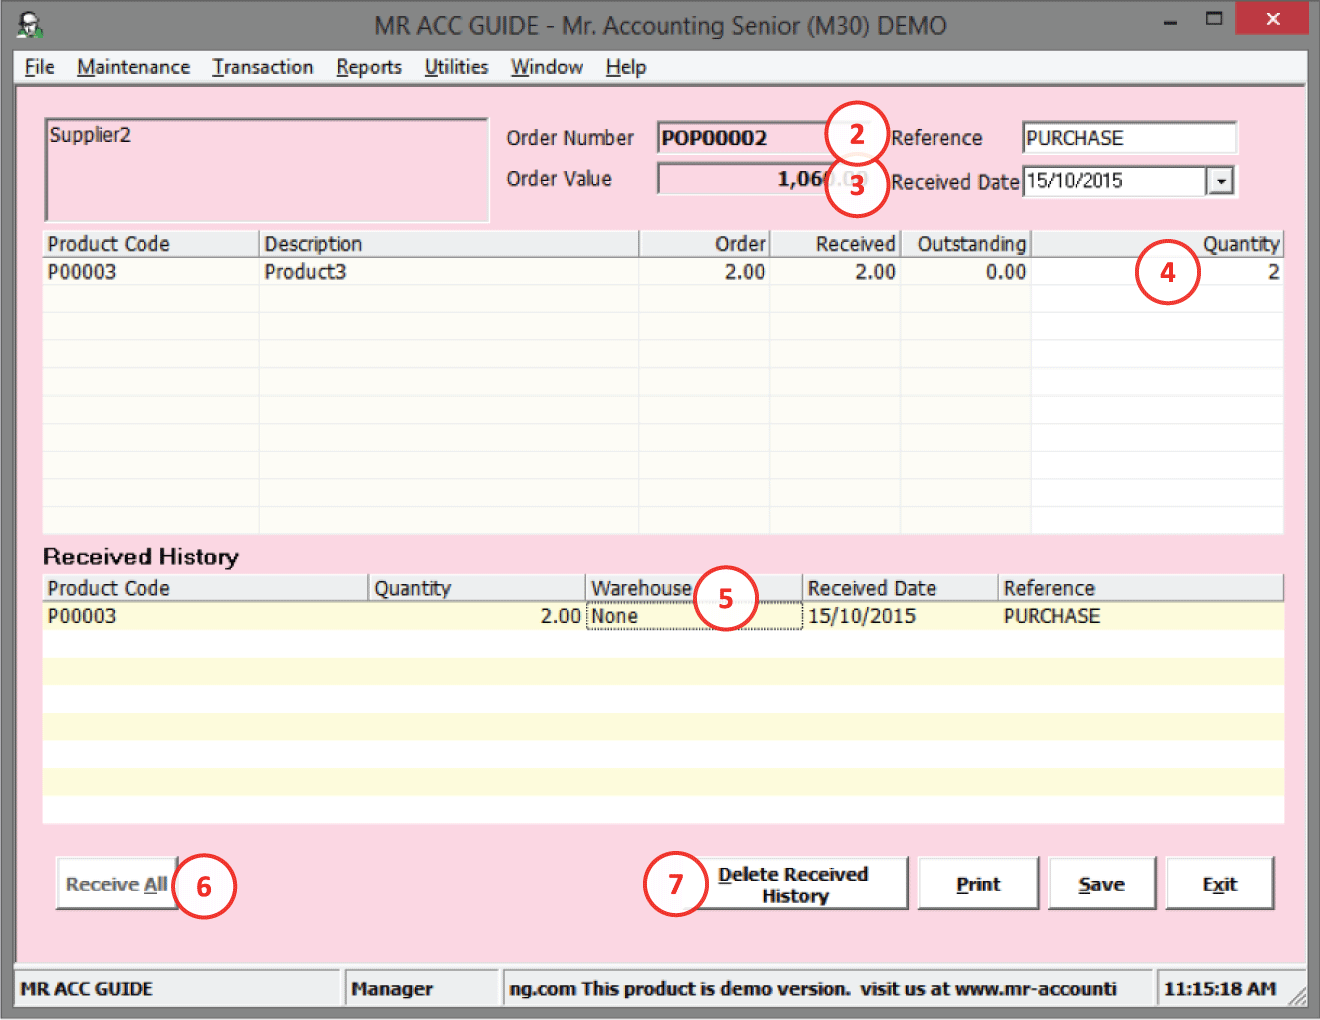
2.
Reference: This is picked up from the Delivery Order No that you’ve entered
in the previous window
3.
Received
Date: This is picked up from the Received Date that you’ve entered in
the previous window
4.
Quantity: Select the quantity that you
received
5.
Warehouse:
You need to set the warehouse under Default Settings in the Product Master
(You cannot
change the warehouse here)
6.
Receive All:
Shortcut to receive all stock in this
PO
7.
Delete Received History:
After you have saved (but before you select Update
GL), you can select Receive and select this to delete the receive
history.
3. Update GL: The entry is posted under Purchase Entry in the Suppier module, which posts double entries to the selected GL codes. The checkbox under the Posted column is ticked after selecting this.
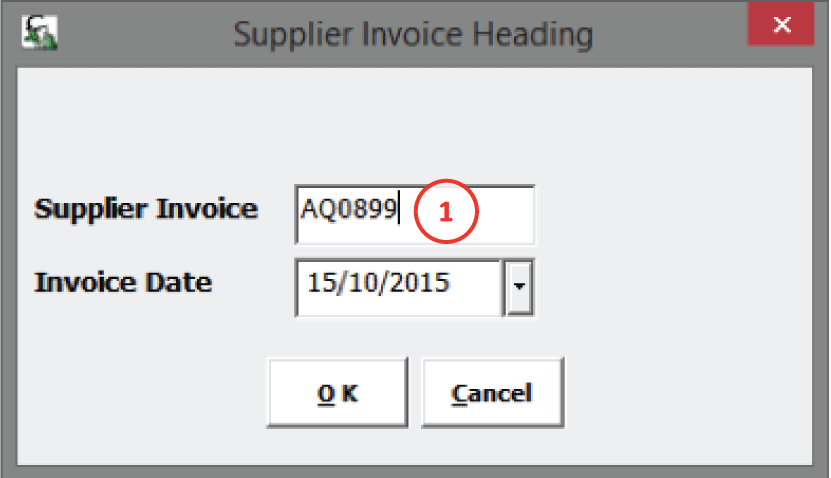
1.
This new window pops
out after you select Update
GL.
Select the Supplier Invoice number from the
invoice that you received, and the date you received the
invoice.
2.
After
you select OK, the details are
picked up in Purchase
Entry in
the Supplier
module.
3.
Select
Save to save and post this entry to
GL.
Note: You must select Order, before you can select Receive; and you must select Receive before you can select Update
GL
Similarly, after you select Received, you cannot
change/edit the On Order status. After you update GL, you cannot change the
Received status. (You need to delete the Update GL tick or the Receive history
before you can amend the Received status or the On Order
status.)
Select New to create new
purchase order and double click on each
entry to edit their details.
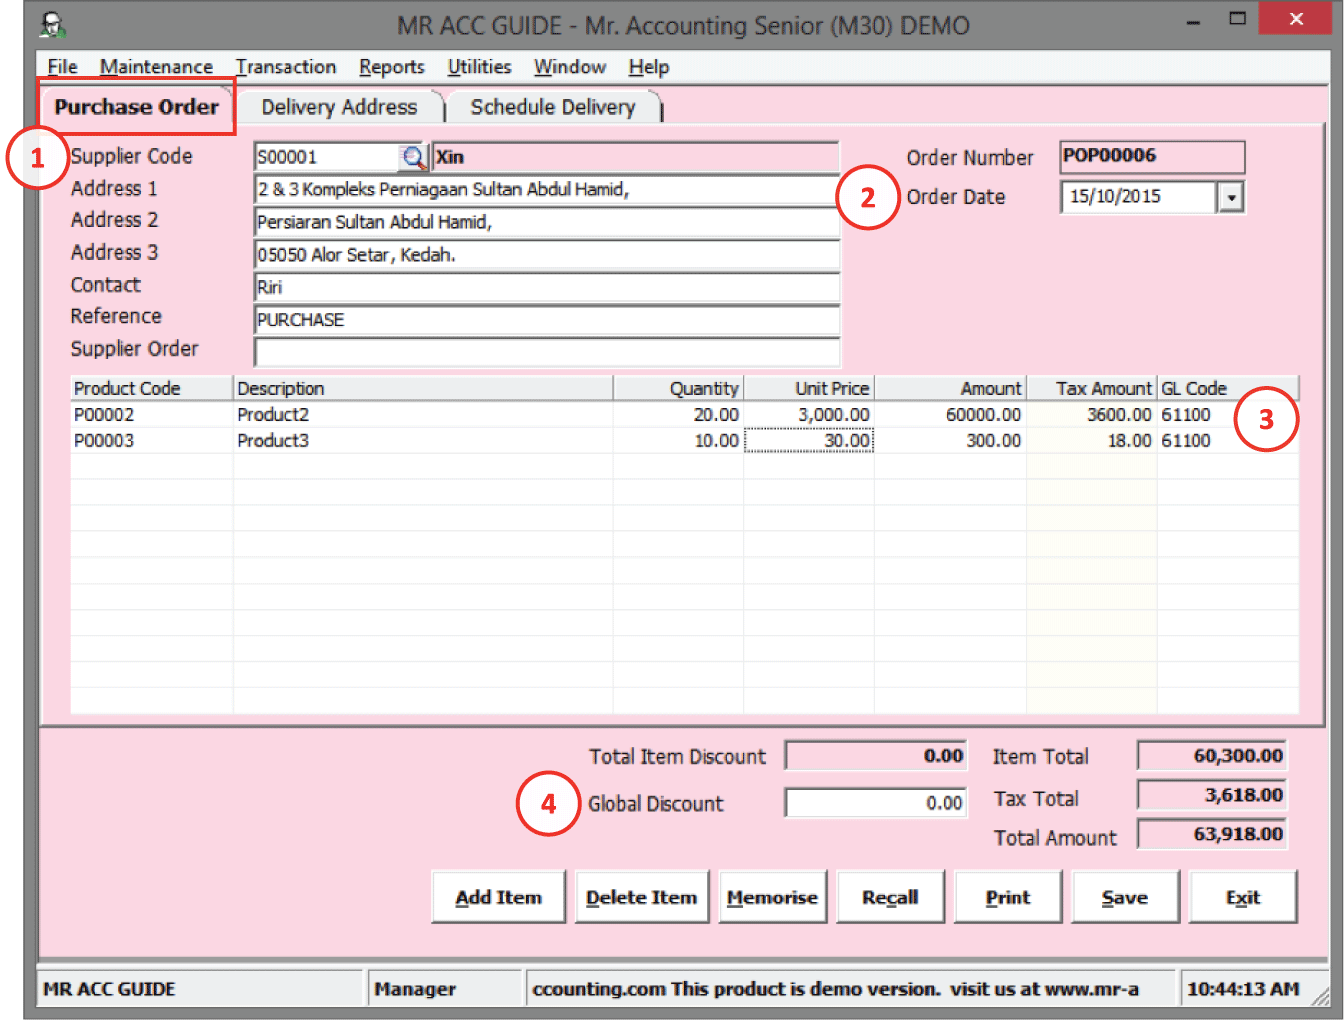
1.
Select the supplier code
and the addresses are selected automatically
2.
The date on the PO that
we received
3.
GL
Code: for the debit entry (usually this is a Purchases GL code under 6. Cost of Goods Sold). This is picked up when you select update
GL
4.
Global
discount: To set a
total discount for the entire transaction. (Don’t use with GST as the system doesn’t
know which product code to allocate discount
to)
Unlike the Sales Order module, the delivery addresses here follow the addresses that you key in under Warehouse in the Stock Control module.
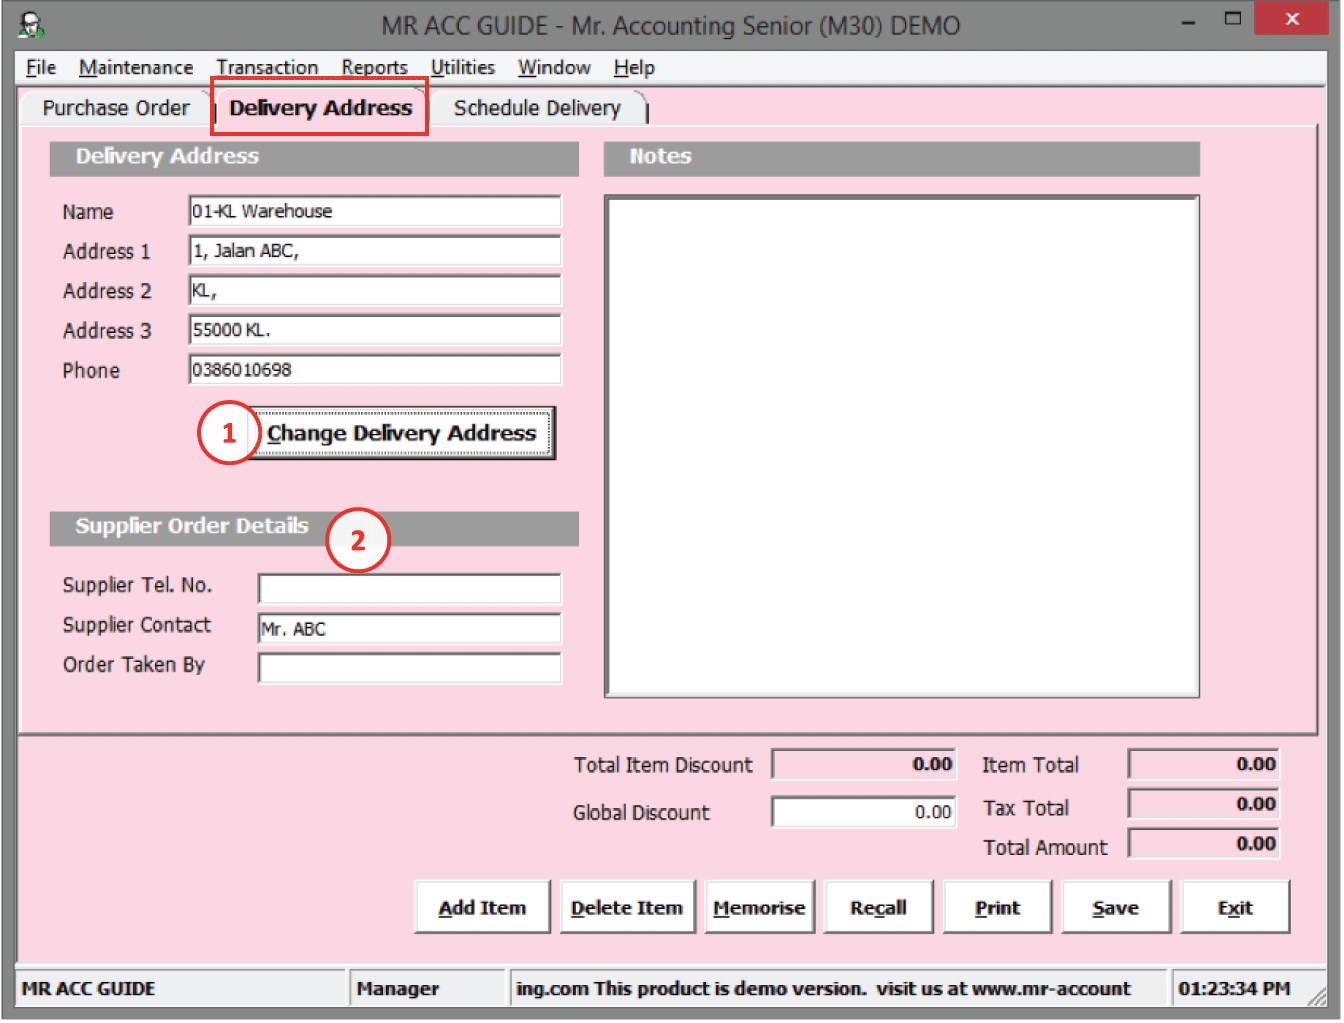
1.
Change Delivery
Address: The Warehouse Addresses new window will pop
out to select the warehouse address.
2.
You can enter
additional supplier tel. no and the name of the person taking the
order
This is similar to the Schedule Delivery tab for Sales Order under the Sales Order module. This is to keep a record of the delivery date that is scheduled and the quantity to be delivered.
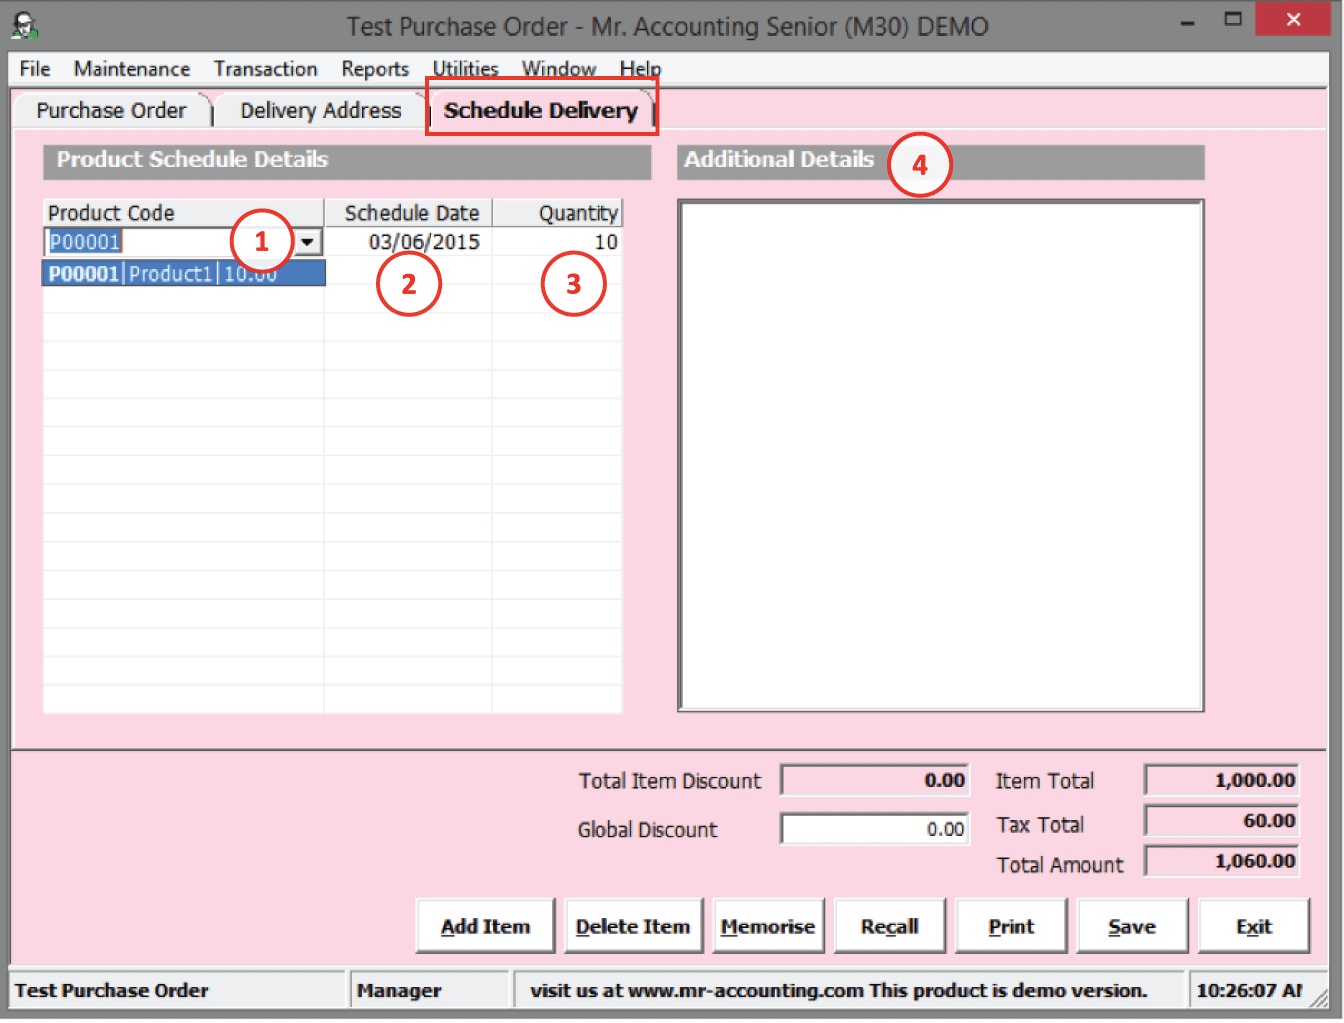
1.
Select the arrow to view the product created in the sales order and
its quantity
2.
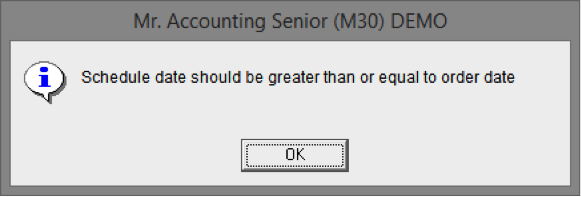
Scheduled
delivery date: must be on
or after order date (a message will pop out below if
incorrect)
3.
Quantity of
goods to be delivered
4.
Additional
Details: Enter remarks
about the scheduled delivery (this is different from Additional Details in
Delivery Address)